
Removing old wallpaper can sometimes seem a daunting project. Worries about damaging the surface beneath often hold people back, yet a careful approach changes everything.
With sensible planning and a touch of patience, what once felt overwhelming becomes manageable and even rewarding.
Assessing the Wall Covering Before Starting
Every successful wallpaper removal begins with a thoughtful examination of the surface. Not all coverings are created alike, and knowing whether you face vinyl, paper, or fabric will influence every step ahead.
Vinyl surfaces tend to appear glossy and resist water, while paper feels more textured and usually absorbs moisture easily. Occasionally, a woven fabric brings its own distinct feel beneath the fingertips.
Identifying the material isn’t just about curiosity. The right method depends on understanding what lies ahead.
If a corner can be lifted gently, observe how it responds to a drop of water. Vinyl will often bead, while paper or textile coverings will soften and release more readily.
This quiet moment of assessment prevents unnecessary scratches or damage, guiding you towards the right tools and technique for your particular wall.
In older homes, layers of wallpaper might have been applied on top of one another, sometimes masking underlying issues such as minor cracks or previous paintwork.
Take note of any unevenness or bubbling, as these features can signal hidden surprises.
Consulting a local decorator or a trusted neighbour who has tackled similar projects in the area can yield valuable insights about typical wall finishes in your building.
Moreover, being aware of the age and history of the wall surface helps you adjust your removal plan accordingly, as some older plasterwork benefits from extra caution and moisture control.
Gathering and Preparing Essential Tools
Preparation makes all the difference when tackling wallpaper removal.
Before any peeling begins, assemble everything needed: a sturdy plastic scraper, a soft sponge, a bucket of warm water, and a wallpaper steamer for difficult areas.
These tools are gentle yet effective, with plastic blades helping to avoid scratches while soft sponges soak adhesive without fuss.
Next, ensure the room is ready for the job ahead. Move furniture away from walls, and cover floors with a sheet to guard against splashes or falling fragments.
Remove light switch covers to reach awkward edges and always wear gloves and protective goggles if using cleaning solutions. This careful preparation turns a stressful task into a more peaceful, methodical process.
If your home is in a block of flats or shares walls with others, it can be wise to let neighbours know when you’re steaming or scraping, as the sound can travel easily through adjoining walls.
For those with pets or young children, set aside a safe play area elsewhere, keeping hazards away from inquisitive hands and paws. At the same time, consider using painter’s tape to protect adjacent painted surfaces or woodwork.
For stubborn patches, a scoring tool that gently perforates the surface can help moisture penetrate deeply, making adhesive removal much easier.
Having a small vacuum cleaner or dustpan nearby also saves time cleaning up debris as you work, ensuring your workspace remains tidy.
Testing and Applying the Removal Method
A patient start pays off. Before tackling the whole room, test a small, hidden area.
Lightly moisten a corner with a sponge and wait for a moment. If the paper lifts without resistance and leaves the wall unharmed, continue with confidence.
If not, pause and consider adjusting your approach. Sometimes, a vinegar and water solution, or a store-bought remover, can effectively remove stubborn adhesives where plain water fails. At times, a steamer will loosen even the most persistent adhesive.
Work in manageable sections, always allowing moisture to do its work. Pull the covering gently sideways, never straight down, to avoid tearing it and minimise strain on the wall.
If resistance remains, add more water or remover and try again after a short wait. Throughout the process, moving steadily and patiently is the surest route to success.
If your room has poor ventilation, a portable fan can help speed up the drying process after each section. Meanwhile, placing a few towels along skirting boards will catch any drips, protecting woodwork from unnecessary exposure to moisture.
When working near electrical outlets, always switch off the power at the fuse box, then check carefully that outlets are dry before turning anything back on.
If you discover a previously patched area that starts to flake or crumble, stop and let it dry fully before continuing, as saturated plaster is more likely to become damaged during removal.
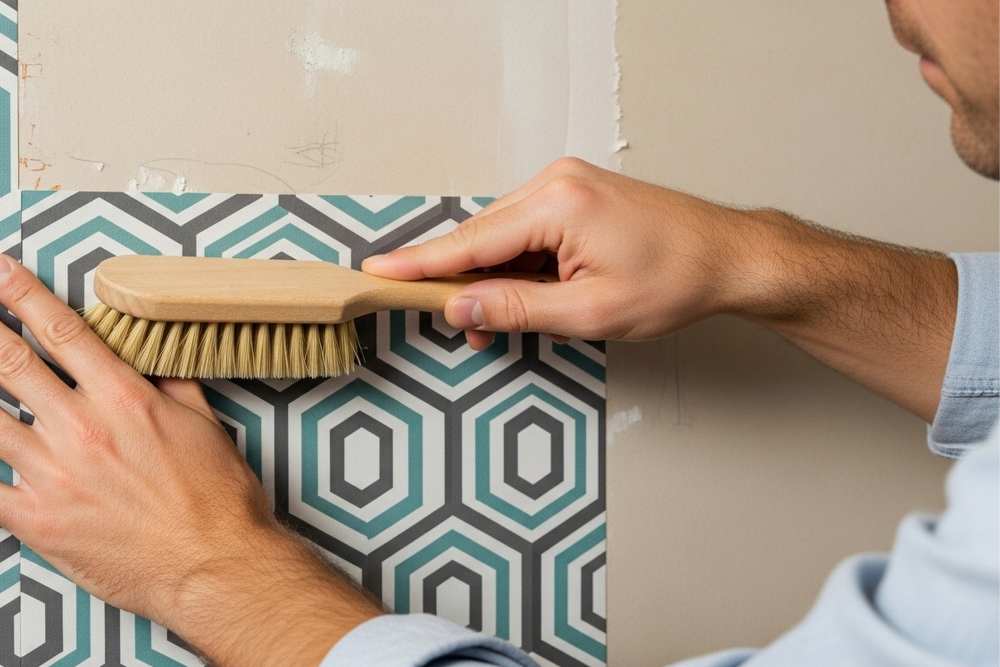
Removing Wallpaper Safely and Dealing with Adhesive
As each strip comes away, check for sticky patches of glue left behind. Warm, soapy water and a gentle sponge usually clear residue, though a dedicated adhesive remover can be useful for stubborn spots.
Open windows to keep air circulating, especially when using stronger products. Always favour plastic scrapers over metal, as they protect the wall while loosening debris.
If any areas prove difficult, a little extra patience is required. Taking frequent breaks prevents tired hands from causing slips or accidental scratches. In cases where glue lingers in awkward spots, revisit them after the main removal, rather than risk harm through haste.
Thorough removal of both paper and glue leaves the surface clean, ready for whatever comes next.
It’s worth noting that different adhesives can react differently to removal techniques. Some older wallpapers were applied using animal-based glues, which soften quickly with warm water, while modern adhesives may need stronger solutions.
If you suspect mould or mildew underneath the paper, take the opportunity to treat the wall with a mild anti-fungal wash before proceeding further.
Removing wallpaper is also a perfect time to check for damp or insulation issues that might not have been visible before.
Cleaning and Restoring Walls After Removal
With the wallpaper gone, attention shifts to cleaning and repair.
Use a fresh sponge and warm water to wipe away lingering dust and small traces of adhesive. Avoid pressing too hard, as gentle cleaning is kinder to delicate plaster. In addition, allow plenty of time for the wall to dry naturally, or use a towel to speed up the process.
Look closely for small dents or holes, as removing old coverings can sometimes reveal hidden flaws. A little filler smoothed over these areas, followed by gentle sanding when dry, restores an even surface.
Once the wall is clean and repaired, it stands ready for painting or a new design. If the project begins to feel overwhelming, enlisting apartment cleaning professionals can offer valuable expertise, bringing worn surfaces back to a pristine state with ease.
If repainting is on your mind, consider applying a primer before your chosen colour. This provides a smooth base and helps prevent stains from old adhesive seeping through.
For those intending to hang new wallpaper, make sure the wall is entirely free from dust and grease, as even small residues can interfere with adhesion.
In the days after, keep the room well-ventilated to allow any remaining moisture to escape.
Should you discover unexpected marks or stains after the first clean, repeating the process with a slightly stronger solution will often resolve the issue. Taking these final steps ensures your refreshed room is a pleasure to use and admire.
Conclusion
A careful approach makes wallpaper removal safe and satisfying.
By assessing the surface, preparing well, and working with patience, it’s possible to keep walls in excellent condition. Each thoughtful step paves the way for a flawless result.